Sunday, May 16, 2021

May 2021


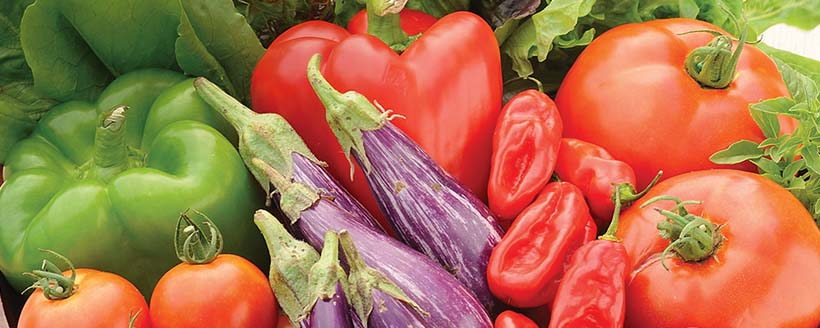
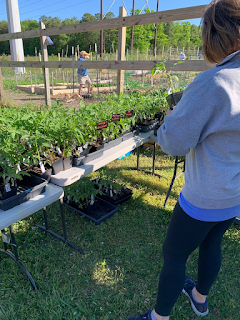
Following the cold-season plant sale, the sale for warm-season plants was a huge success! We offered a large variety of tomatoes, peppers, and eggplant and a couple varieties of herbs. We appreciate the support of our Community Gardeners and the public. Let us know how your plants are growing!


What to Plant When?
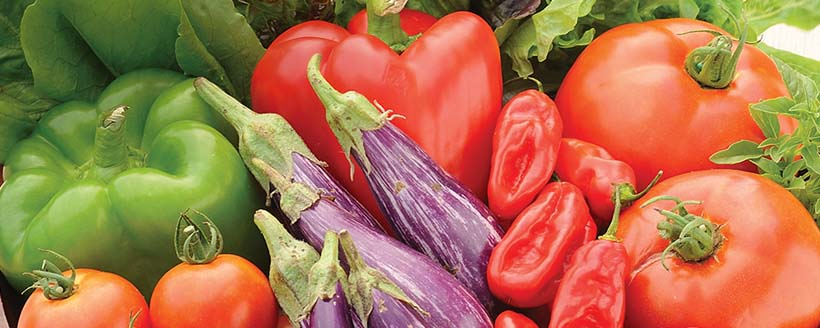

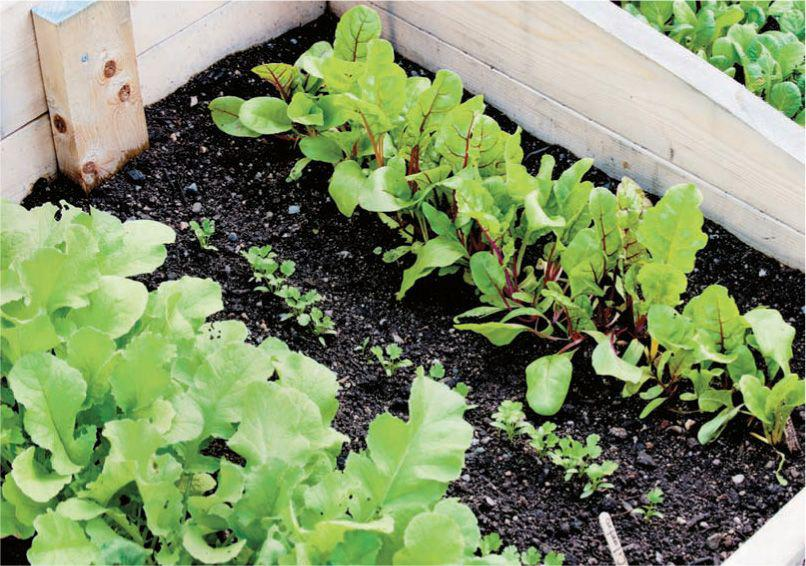
Hurray! It is finally time to plant tomatoes! Or plant them again if you were an eager gardener and the last frost got you, sorry. Now is the time to plant any of the warm-season crops, including cucumbers, beans, eggplant, melons, peppers, pumpkins, squash, sweet potatoes, and watermelon. It is now going to get too warm for planting any more cool-season vegetables, like lettuces, broccoli, beets, and radishes. Save the seed, though, for planting again in August for a fall garden.


Wildlife Control Efforts

As some of you may know (some more than others, Bill!) we have had a marauding bunny in the garden who has been helping himself to tasty morsels from our gardens. We have trapped him twice but he has escaped both times. If you were with us last year, you know the pests-du-jour then were rats (Yuck, but luckily, not this year since we moved the compost bins outside the fence). So, what is the Garden Committee doing to reduce the presence of wildlife pests?


You will notice that the second leg of the new fence on Stadium Road has been installed. The rabbit’s burrow was found on that side of the garden by the Wildlife Control expert who consulted with us. And as all the damage has been to plots near there, we are hoping that this will help. We will also be increasing our mowing of the area near the fence to provide a “no fly zone” to make it perilous for animals to cross without getting picked off by our hawks and osprey. Maybe the perch that has been installed at the south end of the Garden will welcome more raptors.


Of course, there may be other spots where wildlife can gain entry if we are not diligent in maintaining the fence. We have made concerted efforts to secure the remaining fence until such time as we can get funding to continue the permanent fence. Expanding the permanent fence is a major priority and we are hoping we can find resources to continue it this season. We have placed additional sandbags on the base of the plastic fencing near the back gate and ask your help in putting them back when you leave the garden. And we will be developing a program for wildlife control that will include regular inspections of the perimeter fence and improved control of weeds around the fence.


The Garden Committee hopes that our efforts will result in a more secure garden.


Pruning Tomatoes

Advice from Craig LeHoullier, the NC Tomato Guy

From his book “Epic Tomatoes”


Now that we all have our tomatoes planted, here is some advice on maintaining them as they grow with judicious removal of some of the “suckers”.
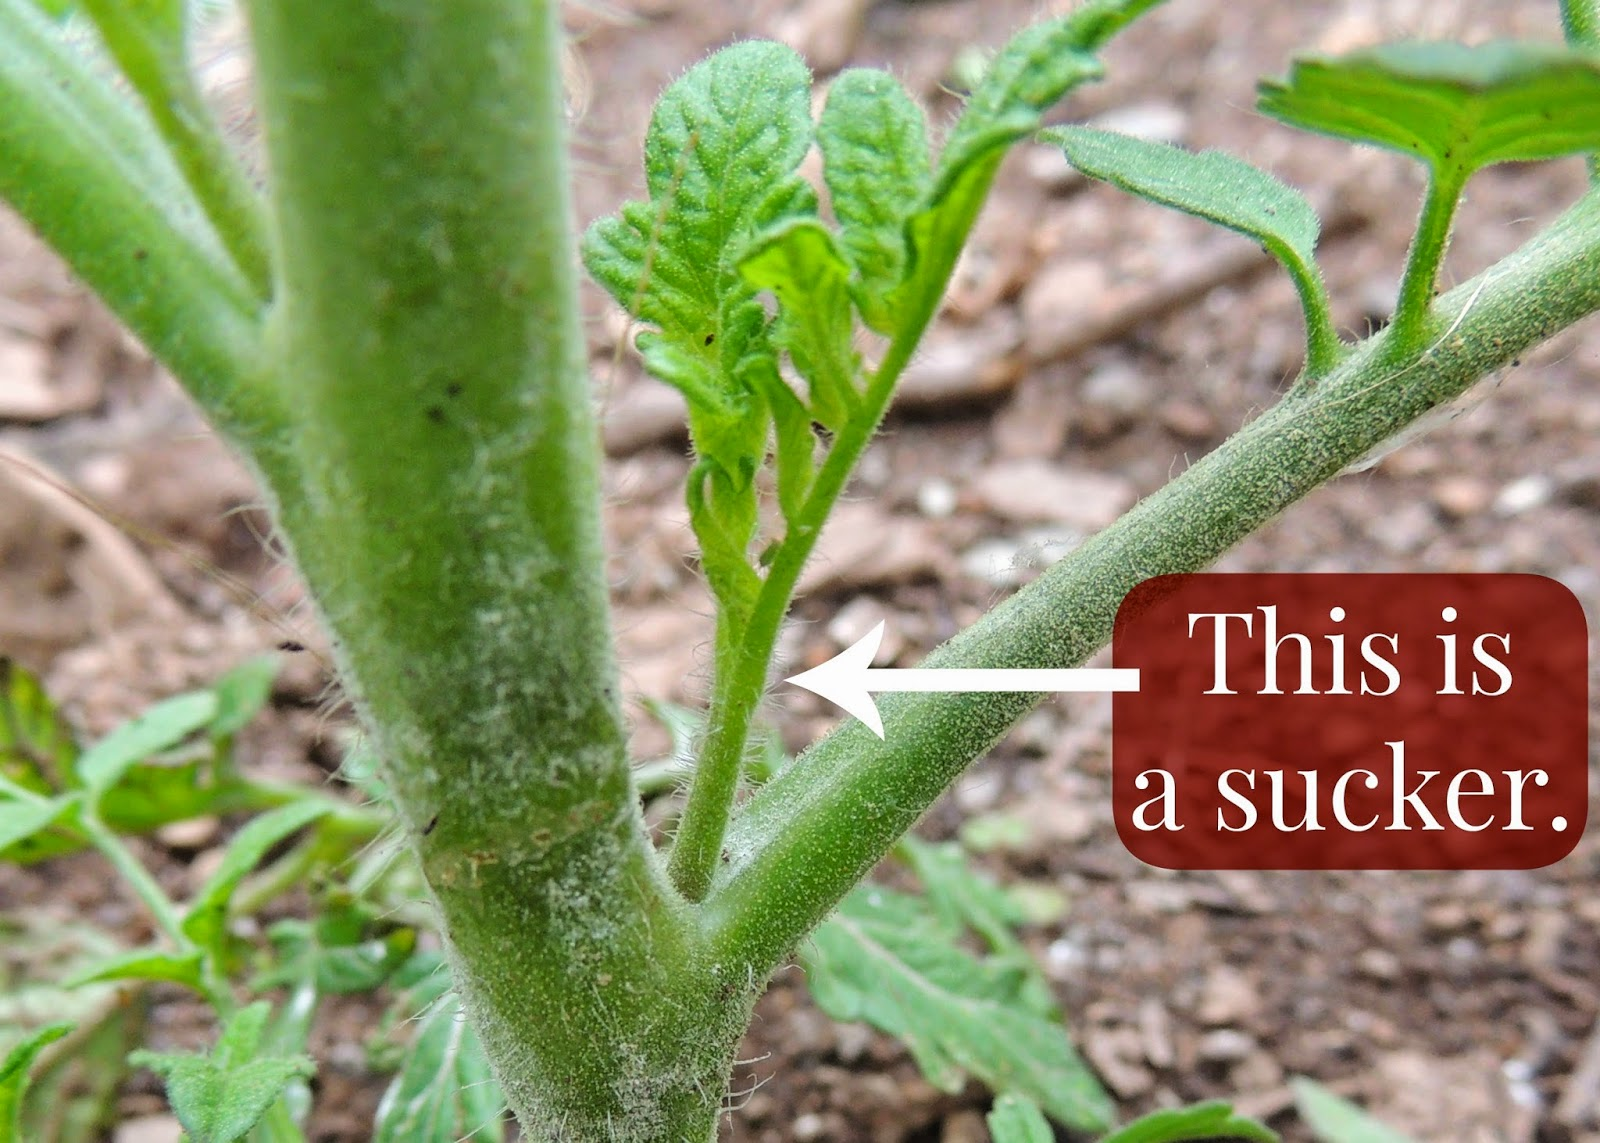


What are “suckers”? Suckers or side shoots are additional fruiting stems that emerge all along the plant at the junction of the main stem and leaf stems. Suckers will be at a 45-degree angle from the main stem. Suckers go on to produce more suckers and a plant can become densely complex and crowded by midseason.


What do suckers provide? Each sucker allowed to grow provides additional flower clusters and hence additional chances for fruit set. If, during the season, the majority of flower clusters open at times when the temperature and/or humidity is not suitable for pollination, the blossoms will drop and no fruit will be produced. Allowing suckers to grow on increases the probability of successful fruit set and increased yield. Suckers also provide additional foliage cover to reduce the risk of sunscald of the tomatoes.


When to snip suckers? An indeterminate tomato plant can grow out of control in a hurry due to the formation of suckers and then suckers from those suckers. Disciplined removal of suckers in order to provide a plant with a finite number of fruiting stems or branches leads to more control over growth and a far easier support task. Pruning to one or two stems will allow for more air circulation between plants and a way to maintain order in what could otherwise become a tangled mass of vines.


Should I “top” my plants? Since more flowers form than will pollinate and ripen before the end of the season, topping also ensures that a plant does not put energy into developing tomatoes that would never get a chance to properly ripen. Pick a plant height equal to the length of the supporting stake and pinch the stem just above a leaf stem that sits close to the final flower cluster. This prevents plants from becoming so top heavy that they topple in storms or develop kinks in branches.


WATERING YOUR GARDEN


By Sally Hewitt 

Our soil is particularly sandy and this results in water draining through the soil quickly. Adding  organic matter to the soil helps it retain water longer. One of the easiest ways to add organic  matter is by mulching, for example, with the leaves we have at the Garden. Mulching your garden has many benefits and saving water is an  important one. Below is a list of some of the many benefits to mulching. 

Reduces water loss 

Reduces weed growth 

Moderates soil temperature- keeping it warmer during cold nights and cooler on hot days Reduces soil fungal and bacterial diseases by keeping the soil from splashing up on your  plants when you water and when it rains 

Breaks down and feeds your soil


Covering the soil with newspaper before mulching also helps to suppress weed growth and hold in moisture. The newspapers will degrade through the season and add to the soil. 

When to water is also important. Watering early in the day or in the evening reduces  evaporation loss.Windy days also increase evaporation- and it is often windy at our garden, so  take that into consideration when planning your watering schedule. 

To keep your plants healthy, watering the roots deeply is important. Watering just the surface  allows your plants to grow roots close to the surface and shallow roots dry out much quicker.  So, watering deeply is better than frequently watering just the surface soil. To see how far  down your water has reached go ahead and stick your finger in the soil and see how far down  it’s moist. If it’s dry an inch down then you need to water some more. Once your plants are deeply watered, they should not need to be watered for as much as a week, if properly mulched. The general rule is that plants need 1 inch of water per week, with some exceptions.

Plants also need water at  specific times in their growth cycle. Newly planted seeds and new transplants need to be kept  moist. Newly planted transplants can also benefit from shade if they continue to be droopy.The  old Farmer's Almanac website has a nice chart detailing critical times to water for different  vegetables. It also shows if vegetables need a lot of water during dry spells, needs water at  critical stages of development, and plants that do not need frequent watering.This chart can  be found at:

Almanac.com>when to water


Living Together - Companion Plants for Your Vegetable Garden

By Kay Clapp


Companion planting in our region traces its roots to Native Americans planting the “three sisters” of corn, pole beans, and squash in one mound. The corn provided support, beans provided additional nitrogen, and squash provided living mulch that shaded the soil and prevented weeds.

While their “gardens” were much larger than our plots, there is ample opportunity for you to improve productivity by controlling insects and improving pollination. Companion plants also support other plants, improve soil quality, shade small plants, and suppress weeds. An overlooked advantage is that plant diversity provides a more visually pleasing landscape.  

Control Insects: One of the first things passed down to me was to plant marigolds in the garden because the smell repelled insects such as leaf hoppers, worms, bean beetles, and nematodes. The scents and bright colors of herbs and flowers confuse harmful pests and attract beneficial insects.

You can plant tomato plants with parsley to attract insects and with basil about 10 inches away to increase yield. Radishes and tomatoes together encourage insects to eat the lower radish leaves first rather than the tomato leaves. Sage repels cabbage moths and carrot flies. Cilantro and dill are natural repellants of insects and also help to attract ladybugs which prey on harmful insects.

Improve Pollination: Flowering plants attract bees, butterflies, moths, and other pollinators to your vegetable plants. Some examples are marigolds and Calendula, which is used throughout the Colonial Williamsburg vegetable gardens. If the marigolds grow too big and start to crowd your companion vegetable, you can prune them back. Nasturtiums attract bumble bees and moths and also serve to “trap” aphids - but you will want to wash the aphids off with a blast of water.

Another cultural practice is to place deep rooting plants next to shallow rooting plants to take advantage of different root zones. A good mix is carrots with peas, strawberries with bush beans, and cabbage with herbs.

Mother Nature is a complex environment that we are just beginning to understand. Don’t worry about trying to grow a perfect garden with the perfect companion plants. Use guidance from the experts and also experiment with some companion mixes of your own. Have fun and keep gardening.

Here are a few references to help.

GARDEN WISDOM: Companion Planting Chart for Vegetables (windowbox.com)

Why Diversity Is an Advantage in a Vegetable Plot - The New York Times (nytimes.com)

Companion Planting and the Green Thumb - University of Tennessee (slideshare.net) 


Macintosh HD:Users:cfryer:Desktop:Screen Shot 2021-05-12 at 2.36.17 PM.png

Recipes from the Garden

Chive Blossom Vinegar

By Carol Fryer


There are two ways to make chive blossom vinegar. You can pour warm vinegar over the blossoms and steep for 1-2 weeks, or you can infuse the blossoms in room-temperature vinegar for two weeks. 

A.  Heated method:

Ingredients

  • 2 1/2 cup chive flower blossoms  (fresh, not faded blossoms)

  • 1 1/2 cups vinegar (white or champagne vinegar) 

1. Rinse the blossoms in water to remove any dirt, then let them dry.

   Lightly crush the blossoms with your hands to release their scent and flavor and loosely pack the flowers into a clean glass pint jar. 

2. Heat the vinegar in a small saucepan over low heat until just warm.

  Pour the vinegar over the chive blossoms . Push the chives down into  the vinegar with a spoon. Be sure there is a small space between the liquid  and jar cover, so the metal is not in contact with the vinegar. 

3. Let the vinegar cool, then place a piece of parchment paper over the jar opening and screw on the top.  Label the jar with the date and store the bottle in a dark, cool spot for 1 to 2 weeks minimum. 

4. When you are happy with the chive-strength of the brew, strain the vinegar in a clean glass bottle, and discard the blossoms.


B. Unheated method:

Ingredients:

* 1 cup chive blossoms

* 1 ½ cup vinegar

* Optional:  ¼ cup chopped chive leaves


1. Rinse and dry the blossoms; slightly crush the blossoms and loosely pack into a glass pint jar.

2. Pour the vinegar over the blossoms until they are completely immersed in the liquid.

3. Tightly cover the jar and label with the date. Store at room temperature away from direct lightfor from heat for 2 weeks.

4. Strain the vinegar into a clean glass bottle.  Discard the blossoms.

 Note: If you use garlic chive blossoms instead of regular chive, there will be a strong garlic-y flavor to the vinegar. 


Thursday, April 15, 2021

April 2021

 Plant Sale - Warm Season Crops


May 1, 2021 at the Gate of the Community Garden


Save room in your garden for the wonderful plants you will find on Saturday, May 1st at the front gate of the Garden! The public is invited from 10-12 to choose from 50 different varieties, almost 1,000 plants - tomatoes, peppers, eggplants, and herbs-  grown from seed in our basements and in the greenhouse.


We have a wonderful selection of heirloom and specialty plants you can't find at the store and at better prices!  Support our garden and  the Williamsburg Community Growers mission to provide food to our local community by purchasing your plants from us on May 1st. Check out the Plant Description document below for thumbnail pictures and descriptions of our products.


We will be trying out our new Square device for credit card sales, but cash or checks are preferred.


Please bring a box or tray - or a wagon! - to carry your purchases away. 


We would love to recycle our pots once you have planted. Just leave them in the shelter.


Looking forward to seeing you all!


Click here for Plant Descriptions


What do I Plant When?


The Extension at Virginia Tech advises that the average last killing frost for our area, Hardiness Zone 7b, is April 5 - April 15. This is an average based on past history. Please remember that we had a late frost last year in our Garden, which is quite exposed. So plant your crops but keep an eye on the weather and protect your tender crops if a frost is forecast.


The following crops can be planted by mid- to late-April, early May:


Bush and pole bean seeds 

Cucumber, seeds or transplants 

Eggplant transplants

Muskmelon seeds

Okra

Pepper transplants

Potatoes

Pumpkins, seeds or transplants

Summer squash, seeds or transplants

Winter squash, seeds or transplants

Sweet potatoes

Tomatoes, transplants

Watermelon, seeds or transplants

Sweet corn seeds


***Warning - Basil should not be planted outside until low nightly temperatures are reliably above 50 degrees.


As the weather warms, several crops have reached the point where they will not prosper if planted now. So it is almost too late to plant: cabbage, beets, broccoli, carrots, chard, collards, kohlrabi, leeks, lettuce, onions, peas, radish, spinach, and turnips. Consider planting these again later for a fall harvest. See article on Succession Planting from Elvin Clapp below.


Succession Planting 

by Master Gardener Elvin Clapp

Often, we are tempted by those early flashy tomato plants displayed in colorful pots at the store or garden center.  Who can pass by and not purchase beautiful 20 inch tomato plants bearing fruit and just begging to be placed in our plots in March? Those tender plants probably will not survive Jack Frost and may be too mature to adapt to a new location in the great outdoors. So how can we get the best bang for our buck with a 10’ x10’ or 10’ x 20’ plot? One key is succession planting.

Succession planting is part of an intensive strategy for getting the most produce for our plots. Basically, it’s planning and planting according to our garden seasons, and planting something new in the place where previous plants have been harvested. Keep in mind that we are in the USDA Plant Hardiness Zone 7B, so read the labels and consult planting guides published by local universities such as Virginia Tech (ext.vt.edu), N.C. State University, or the University of Maryland. For Zone 7, the average last killing frost is April 15. Keep in mind that this is just an average and Mother Nature will decide the actual date.

Spring Season: We can get an early spring start with cold hardy annuals such as carrots, onions, lettuce, broccoli, and peas. Consider planting a row or two of your favorites, then wait 2 weeks and plant another row to have a continuous harvest to enjoy. Plants like lettuce will bolt in the early summer as the temperatures rise. Once you have harvested this crop, you have a new space for warm season plants. February and early March is a good time to start seeds indoors to be transplanted later.

Late Spring and Early Summer Season:  Follow up with warm season crops such as tomatoes, beans, peppers, eggplant, okra, etc. I like to wait until a couple of weeks after the last projected frost before planting sets or plants. You can plant earlier than the last heavy frost, but be prepared to cover your plants if a frost or freeze is predicted. Our community plots are exposed to wind and an open environment, so your space may get temperatures a few degrees colder than what you record at home.

Fall: This is an excellent time to plant cold season crops such as lettuce, turnip greens, kale, collards, etc. in the space where your warm season plants are no longer productive. Plant in the late summer and add two weeks to the maturity date. If the seed packet specifies 50 days to maturity, the actual maturity date is 64 days as the amount of sunlight and temperature declines throughout the fall. 

Winter: Kale, collards, turnip greens, etc., can survive throughout a mild winter like the one we have just experienced. However, many gardeners opt to plant a cover crop to reduce soil erosion, reduce soil compaction, and provide organic matter. For more information on cover crops, consult the Piedmont Master Gardner’s article listed below.

Finally, keep a log or record of your gardening experience. Which did better, direct seeding or transplants? What varieties survived and thrived? Keep account of your watering schedule, rate and type of fertilizer, plant rotation schedule, weed control, and what you harvested. Also, walk around other plots and chat with the member who have several seasons of experience. Remember, the most productive garden is the one not only provides a “flavorable” harvest, but one where you derive pleasure in visiting and working in every week.


References:

https://www.pubs.ext.vt.edu/content/dam/pubs_ext_vt_edu/426/426-335/426-335.pdf

https://content.ces.ncsu.edu/home-vegetable-gardening-a-quick-reference-guide

https://marylandgrows.umd.edu/2012/03/07/how-to-succeed-at-succession/

https://piedmontmastergardeners.org/article/the-missed-opportunity-cover-crops/


Garden Etiquette/Rules


  • The Garden Agreement states that Gardeners agree to “Maintain/tend (their) plot from the time of assignment and/or start planting by May 1st.  Failure to do so may result in forfeiture of the plot fee and reassignment of the plot to someone on the waiting list. 


  • Just another reminder that the water at the Garden is a valuable resource, even though it comes from the retention ponds nearby. We are quite lucky that the irrigation system at the sports complex was turned on in time to refill our cisterns after the recent spill of over 1,000 gallons of water. Please be careful to turn the water off at the valve near your plot. As a refresher, when the toggle is aligned with the pipe, the water is on; when it is across the pipe, it is off. 


Garden Growers

People in the Garden


Meet Farm Manager Liz Callan


I am the WCG Farm Manager, and I love getting people involved in growing their own food! I'm an agronomist (I received my Masters from LSU) and I was also a Hillside Agriculture Peace Corps Volunteer in Honduras, and a Community Supported Agriculture farmer in Troy, NY. I also work with the WJCC Schools School Health Initiative Program (SHIP) as the Culinary Educator. Besides gardening, I love Irish step dancing, crocheting and making soap (I have a small Etsy shop called Mountain Mermaids)!


Last April WCG received a grant from the National Association of Conservation Districts which funded my part-time position for one year. This is the first time WCG has had a paid employee! I work mainly with the Teaching Farm. I love working with our volunteers, showing them how to grow veggies, and fostering their love of local food and life-long gardening skills. Our volunteers are service-learners, and we donate most of our harvest to local food pantries. You all are welcome to join us any Tuesday (5:30 - 7 pm,) or Saturday (7:30 am - 12:30 pm), or any time I'm out at the farm working! :)


To bring a bit of financial stability to WCG, last year we opened our Farm Stand (open 9 - 11 am Saturday mornings, once we have produce to pick).  


Come and visit with me any time you see me in the garden. I look forward to getting to know you all!

Liz


Saturday, March 13, 2021

March 2021

In This Issue:

What Do I Plant When?

Tips on the Tiller

Under Construction: The Rain Garden and Bog

ToMAYto or ToMATo?

Garden Growers

Updates


P L A N T  S A L E   S A T U R D A Y !

Attention all gardeners- spring has sprung and we have some perfect plants for you to put in your gardens now!  Please join us at the Plant Sale this coming Saturday (3/20) from 10 to noon to purchase collards, kale, chard, lettuce, and broccoli!  They're $3 for 6-packs and $2 for 4-packs.  Hope to see you Saturday morning!!  
 

What Do I Plant When?

All the transplants and seeds recommended for planting in February can continue to  be planted in March (see Newsletter, below). Between April 5- April 15 or when you believe the last killing frost will come, you can begin planting:

bush and pole bean seeds 

cucumber seeds 

eggplant transplants

muskmelon seeds

Sweet corn seeds


You can spread the harvest out if you plant a second crop of beans about 2-3 weeks after the first. Planting 2 rows of bush beans close together helps them to support each other and grow tall.


Peas should be planted before April as they do not like hot weather.


After April 15 you can begin planting Okra seeds, pumpkin seeds, and watermelon seeds.


Tips for Using the Tiller


Williamsburg Community Grows is the proud owner of a brave little vintage Sears 5hp gas-powered rototiller. It was purchased in 1994 and has faithfully worked vegetable gardens in Illinois and Northern Virginia before its owner moved to a nearby over-55 community with a very active and vigilant HOA. So the tiller came to live with the Community Garden and all you Gardeners are welcome to use it in your plots.


Volunteer Robert Reining was kind enough to overhaul it this spring so it runs really well at present.


To use the tiller:


  • After pulling it out of the shed, check the fuel level. If it is below ¼ tank, use the red gas can in the shed to fill it. DO NOT USE THE CAN MIXED WITH OIL, JUST STRAIGHT GAS.


  • Slide the Choke indicator to ON - all the way to the right.


  • Slide the Run indicator to FAST - all the way to the right.


  • Holding the right handle with your left hand to steady the tiller, grasp the starter handle with your right hand and pull sharply up and back. It may take a few pulls for the engine to catch.

  •  Once it starts, move the Choke lever back to the middle while the tiller warms up, then turn it completely off. If you are restarting the tiller after it has been running, do not engage the choke.


  • To start the tiller moving forward, holding both handles, squeeze the lever under the left handle. The tines will begin to move. You can use this to propel the tiller to your plot. You must continue to squeeze the lever or the tines will stop turning.


  • To till your soil, first drop down the drag bar at the rear of the rototiller, below the handles. This will hold the tiller back so it digs deeper into the soil rather than bouncing across the surface. If you want to just till the weeds on the surface then do not use the drag bar. 

  • Work your plot back and forth, using a rocking motion as needed to get the tiller to move forward. Think of a Zamboni!


It is important not to overwork the soil or to till the soil when it is wet!!! This can ruin the structure of your soil by pulverizing it into tiny particles or turning it into clumps, respectively. Only go over each part of your soil one time with the tiller. If it has rained recently, squeeze a handful of soil before you start and if it sticks together in your palm when released, the soil is too wet. 


Our rototiller is a great tool to help you break up the soil and turn in amendments like compost or leaves. Please be kind to it - it is a senior citizen!


Under Construction - The Rain Garden/Bog


You may have noticed the construction going on near the front fence line. In an effort to collect and use excess water in that part of the garden a team of volunteers has created a rain garden.


What is a Rain Garden? 

A Rain Garden is a shallow depression (a basin) in the ground planted with deep rooted plants. During storms, the Rain Garden collects, filters and infiltrates rainwater runoff from gutters, driveways, and lawns.  It prevents runoff from going into the sewer system, onto neighboring land, and into our streams and rivers. A Rain Garden temporarily stores up to 6 inches of stormwater that is filtered and absorbed by the plants and absorbed into the ground within 24-36 hrs. The water infiltrated into the ground helps to refresh the ground water aquifer. 

Rain Gardens  can be a part of your landscape design and can help you to better manage stormwater on your property.

Resource; https://www.pubs.ext.vt.edu/content/dam/pubs_ext_vt_edu/spes/spes-13/SPES-13.pdf

 By Carol Fryer, VCE Master Gardener, James City County/Williamsburg, VA                         March 2021


In our situation, there is a mostly impervious layer underneath our rain garden that makes it difficult for the water to infiltrate. As a solution, a catch basin has been created which can pump the accumulated, filtered water to a nearby cistern. The pump is powered by a solar panel. This arrangement allows use of the excess water to irrigate the garden. Drain tiles have also been installed on either side of the rain garden to help pull excess moisture away from the new plots near the fence.

Volunteer Robert Reining is also adding a water feature which will drain into a bog area. This area will be planted with water-loving plants and will provide a visual and sound aesthetic to the rain garden.

As it gets closer to planting time in the rain garden, we will publish a list of the plants we are looking for to request donations of divisions from any of your home gardens.


Stages of Construction:

Charlie, Bob Fairbairn and Liz excavating the site.

Rainwater fills the excavated area.

Jenn Nagle-Meyers and Liz augering holes for vertical drainage.

Robert Reining studying drainage system.

Liz and Charlie after filling in excavated site with bioretention mix-- sand, compost and topsoil.

For more information about rain gardens see Create a Rain Garden https://www.almanac.com/content/rain-gardens-two-designs-and-plant-list#


ToMAYto or ToMATo

By Barbara Loesch


However you pronounce it, there are a number or varieties out there which include those for slicing, those for making tomato sauce and paste, i.e. Roma, and those little cherry types for snacking.  And then there is determinate, indeterminate and semi-determinate.  Until last year I never realized there was such a thing as a determinate tomato and probably, had I heard the term, would have thought that was a plant that was “determined” to grow whatever the weather threw at it.  And were you aware the tomato is a fruit?


Determinate varieties:

·         These are also called “bush” tomatoes and because they are smaller than other varieties they can be planted closer together.  These plants produce one crop then very little thereafter.  If you plant this type and want tomatoes throughout the season, they should be planted successively. Examples would be Early Girl and Celebrity. Even though they are “bush” tomatoes, they do benefit from being in a cage. Do not “sucker” this variety.  Suckers are branches that start to grow between the main and another branch. This is a good canning tomato because it produces fruit all at once plus they are good for container gardening. Some types of cherry tomatoes are also determinate varieties.


Indeterminate varieties:

·         These are also called “vining” and require being staked or caged.  They can grow to 6 feet or taller.  They produce fruit throughout the season so you can have blossoms, green and ripe tomatoes all at one time. They benefit from having suckers removed. They continue to produce until frost.  An example of this type would be the Beefsteak which is a big, juicy slicing tomato. There are indeterminate varieties of cherry tomatoes also.


Semi-determinate:

·         These varieties are more compact than indeterminate tomato plants but do benefit from being caged.  They produce fruit throughout the season.  It is suggested to keep 3 main stems and do not remove suckers from them. Burpee Seed catalog offers the Atlas Hybrid which is described as having “1 lb. tomatoes with unsurpassed balance of sweetness and acidity” and can be grown in patio tubs or barrels.  It is described as a “slicer”.


Heirloom Tomatoes:

We hear about and see “Heirloom” tomatoes in the grocery stores.  But what exactly is an Heirloom?  Traditionally the term was applied to a variety whose seeds were passed down through generations in a family.  Now that the term is popular, there are different definitions.  Two tomato experts, Craig LeHouttier and Carolyn Male at TomatoFest Garden Seeds coined the following definitions:

·         Commercial Heirlooms:  Open-pollinated varieties introduced before 1940 or tomato varieties more than 50 years in circulation;

·         Family Heirlooms: Seeds that have been passed down for several generations through a family.

·         Created Heirlooms: Crossing two known parents (either two heirlooms or an heirloom and a hybrid) and dehybridizing the seeds until the desired characteristics are developed which can take as many as eight years or more.

·         Mystery Heirlooms: These are varieties that are a product of or natural cross-pollinated of other heirloom varieties.

Good news:  The garden will have a family heirloom tomato, the Uncle Joe, available for sale at the warm weather plant sale.

Our first season at the garden was a time of great joy being outdoors, working with plants, getting dirt under our nails, and having great hopes of beautiful and abundant crops of vegetables and flowers to share with neighbors and friends.  Our zinnias were beautiful and kept our houses filled with flowers.  The beans had bunny problems and, hopefully, our tomato crop will be more productive this year than it was last year.  Darlene and I had 10 or 12 plants and we were almost overwhelmed wondering what we would do with all the tomatoes we would pick.  Well, we had enough for our sandwiches and salads but my “preserving” amounted to about one pint of tomatoes.

So, we are looking forward to another year at the garden and can’t wait to get that dirt under our fingernails.  Happy gardening to everyone.


Garden Growers

People in the Garden


Meet Charlie Morse, Charlie is the Executive Director of Williamsburg Community Growers (WCG). While this sounds like an honorary, administrative position, those of you who have seen Charlie working tirelessly around the garden know he is very much hands-on. Officially, he is responsible for the Community Garden, the Teaching/Urban Farm, and the Food Access Team which is responsible for connecting the WCG farm and garden and locally grown produce to our greater community with our food donations. Unofficially, he puts in our irrigation system and makes sure the cisterns are full, runs power and water for the greenhouse, drives the tractor, helped build the rain garden, sources supplies, built the berry garden, puts up fences, traps rodents, and does anything else that needs to be done. Here is how Charlie describes his coming to WCG:


In 2010 I helped start a school garden at Blayton Elementary School. I was the technology teacher and ran a computer lab for all K-5 students. Since it was a windowless lab, starting a garden was a welcome opportunity for me to get outside.


When I saw how the kids responded to working in the garden I realized what a great learning space it could be. I also discovered how much fun it was to grow things. Further, I realized how out of touch many kids are with the natural world. This was made clear one day when a group of second graders were helping to harvest. A boy pulled a carrot out of the ground and said in amazement "This looks just like a carrot!" And when the cafeteria manager made sweet potato pies from the fall harvest for the whole school, there was no turning back!


In 2015 I retired from teaching, and when Williamsburg Community Growers was being formed it was an easy decision for me to get involved. I had gained some skills in developing irrigation systems in concert with solar power and thought it would be fun to build another garden from the ground up. It also allowed me to continue the important work of showing young people where their food comes from.


Thanks to all the folks who have pitched in and have helped make the garden and farm a success. I'm looking forward to many more years of growing!


******************


Our New Volunteer Sign Up Link :   https://www.givepulse.com/group/events/482301 if you want to sign up for volunteer spots on Tuesday afternoons or Saturday mornings.


Farm Stand and CSA (Community Supported Agriculture): To bring a bit of financial stability to WCG, last year we opened our Farm Stand (open 9 - 11 am Saturday mornings, once we have produce to pick). The Farm Stand will be open Saturday, March 20 for our Plant Sale. 


This year we are also running a small CSA subscription farm, with 10 Sustaining WCG Members whose donations will support the garden. CSA Members will receive a weekly bag of veggies from May 22 to September 23 in thanks. Let us know if you or anyone you know would like to join!

*************************************


What's Happening!

November 2022

These images highlight how far we have come since 2018 and plans for the future. The hard work and dedication of our volunteers and growers ...